

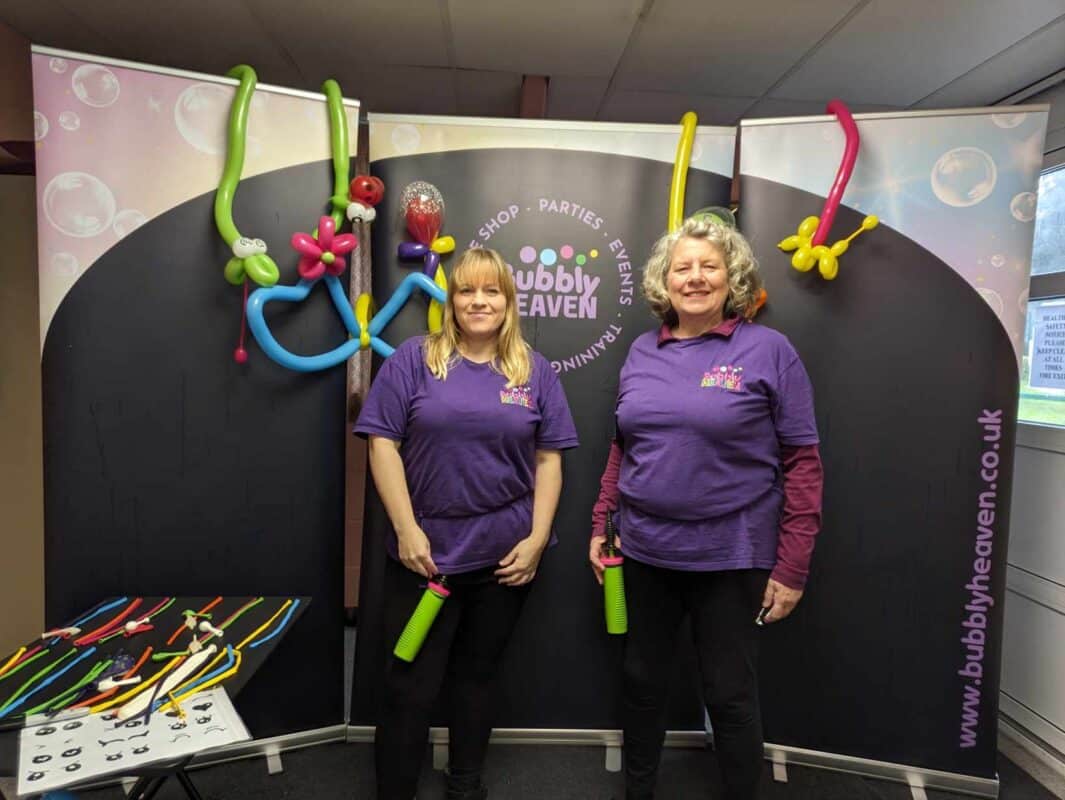
Introduction Video
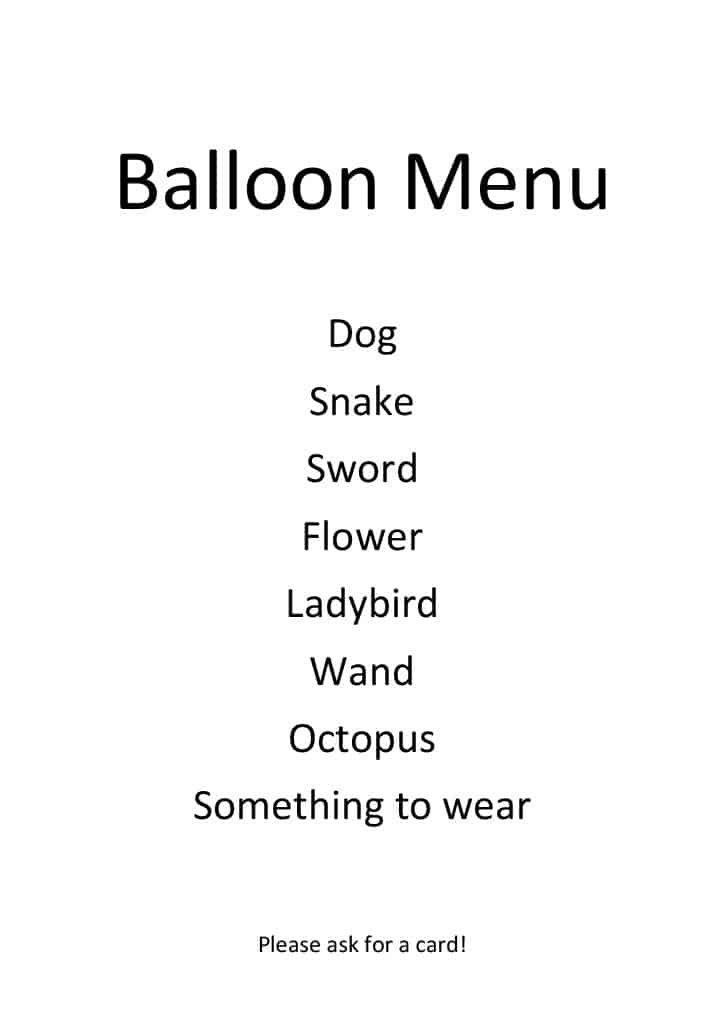
In this course we will teach you 16 designs. The menu we will give you has 8 choices, so for each choice you will have 2 designs to choose depending on if you want to impress OR keep it simple when you have a big queue.
Health & Safety
Critical risks to be aware of:
- Severe Allergic reaction to latex.
- Choking hazard from balloon remnants for children and animals.
- Spread of infection – kids touching and putting balloons in their mouth.
Good working practices
- Never touch balloons with mouth
- Inflate balloons near anyone’s face
- Never hand a balloon to children 3 and under. Hand to adult who can tie it to buggy. Warn adult that if a child bites a balloon and inhales when it pops, bits of burst balloon could enter the trachea and cause choking. A great question is “Does the child still put things in their mouth?” To make the adult think twice about giving them a balloon.
Things to know:
STRETCHING BALLOONS before inflating
Don’t stretch your balloon unless it’s for a purpose. It destroys the structural integrity of the balloon and makes it hard to make a model that doesn’t fall apart. (You may see people stretching before mouth inflating or for another reason).
Mouth inflation
We recommend not to do this. Apart from being hard to do and dangerous to perform we also shouldn’t be encouraging kids to put balloons in their mouth. It’s also unhygienic and has health risks.
Download our risk assessment
Balloon Course - 1st Video intro and set ups

Vocabulary
Testing Caroline and Vocabulary
Caroline's Balloon Training Test, Vocab and terms.

Cheryl getting things wrong
Balloon Course - Cheryl getting things wrong and learning.

Vocabulary:
TIE – Tie the balloons (see video for different methods).
FINGERS – Pinky, ring finger, don’t talk about this one, forefinger and thumb.
INFLATE – Blow the balloon up using a pump.
BURP– Burping balloons (letting air out to release pressure before tying)
Let some air out of the balloon to release pressure before tying.
If a balloon is burped wrong and becomes too soft, use a new one. The balloon walls are thinner when inflated a second time, which causes loss of structural integrity, so it’s more likely to pop or be too soft, so twists will not stay in place. Pressure is required to hold the twists in place.
SOFTENING & ENLONGLATING – Squeezing the balloon to redistribute the air.
BEAD – The mouth of the balloon.
NIPPLE – The uninflated puffed end of the balloon.
LOOP – These can be different sizes. The balloon is in a loop shape that is then twisted or tied.
PUFFED – The balloon is tied with enough air to make a tube (but not inflate).
2-FINGER PINCH TWIST – 2 finger bubble that is twisted to secure. I can also be called an ear twist.
HOLD – When your balloons are not secured but you keep hold of the balloon design to stop it from untwisting. Usually holding with your pinky and palm, under arm, under chin or between legs.
SECURED – When the balloon is twisted so it doesn’t unravel. (However, this may unravel when the kids play with it).
LOCK – This is something we do after the balloon is secured (if we don’t want it to unravel when the kids are playing with it). This can be achieved where you are passing a bubble or a knot through a joint. There are 4 ways to lock a bubble (see video)
JOINT – Anywhere that balloons are twisted.
FIGURE OF 8 – Is a form or locking. By wrapping the balloon knot around two bubbles or joints in a figure of 8.
PRECISION BUBBLES – A sequence of 2-finger bubbles that are not secured or locked.
NON – DOMINANT HAND & DOMINANT HAND – Your dominant hand will be your writing hand.
SQUEEZE & TWIST or TWIST – This determines where you end each bubble. You are sealing a bubble length by squeezing and twisting. Always twist in the same direction.
DISTORTION – Changing the shape of the balloon, we use rocking and pinching in this course.
ROCKING – Rocking the balloon (in a U shape) back and forth to manipulate its shape.
PINCHING – Bend the balloon in an upside-down u shape and pinching the bend.
OVER INFLATED – When you put too much air into the balloon, it will likely pop on your first or second twist.
UNDER INFLATED – When you don’t put enough air into the balloon, you will likely not be able to complete your design or it will be very loose.
HIDE THE BEAD or NIPPLE – Pull tight and release nipple (or bead) to hide it by embedding it into the joint.
BUBBLE – Bubbles can be different sizes; they are pockets of air seal by twists in an inflated balloon.
DOUBLE STUFF – Stuffing one balloon inside another (usually clear). So when inflated one balloon is inside the other.
How to tie a knot
Caroline tying a knot.
Balloon Course - Caroline Tie knot 1st of sequence

Cheryl tying a knot.
Balloon Course - Cheryl tie knot

Holly (8 year old) tying a knot.
https://youtu.be/AfwQS5CC6vY
What balloons and supplies will you need?
Things you will need:
Everything you need will cost you approximately £85 to start the course
- Pump (We suggest the large Qualatex two-way green pump)
- Scissors or a balloon cutter
- Black Sharpie
BALLOONS YOU WILL NEED:
We recommend Qualatex balloons as they are industry standard. (Our instructions are for Qualatex).
- 2 bags of 100 mixed 260s (We suggest the tropical mix to start with)
- 1 bag of white 5’’ round balloons
- 1 bag of red 6’’ heart balloons
- 1 bag of diamond clear 6’’ Quick Links or diamond clear 5” round balloons (for alien helmet)
- 1 bag of alien head 5” printed round balloons.
- 1 bag of 11’’ Round Big Polka Dot balloons (Colourful assortment)
- 1 bag of assorted carnival 646 modelling balloons.
Extras (not necessary for the course but for added panache):
- Stars-A-Round Clear Printed Balloons.
- Other printed balloons are available, we like the unicorns, Spiderman, Star Wars and the Avenger Pack, especially the Hulk.
You can obtain all the balloons you need from:
UK suppliers
USA suppliers
- https://www.tmyers.com/pages/qualatex
- Join our Newbie Balloon Modeller Facebook Group and ask for recommendations for local suppliers.
Amazon also sell some of the balloons and equipment you need.
Set ups
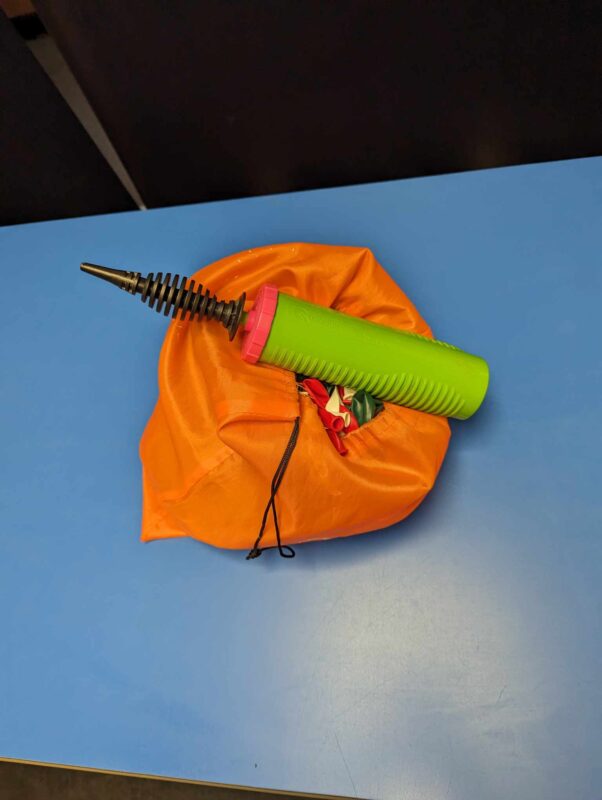
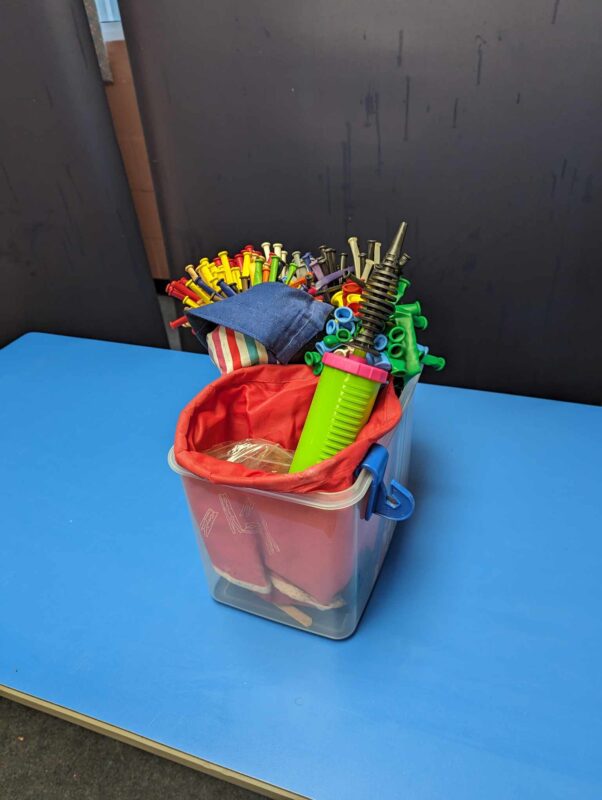
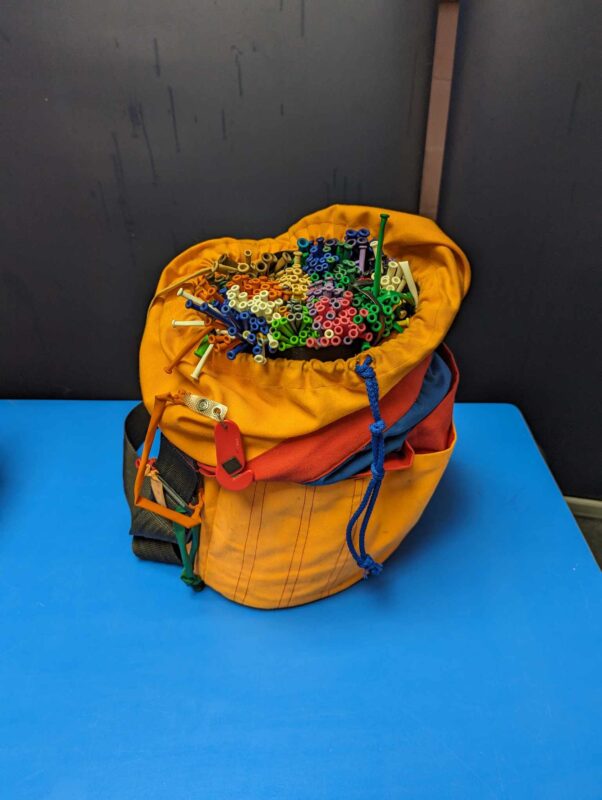
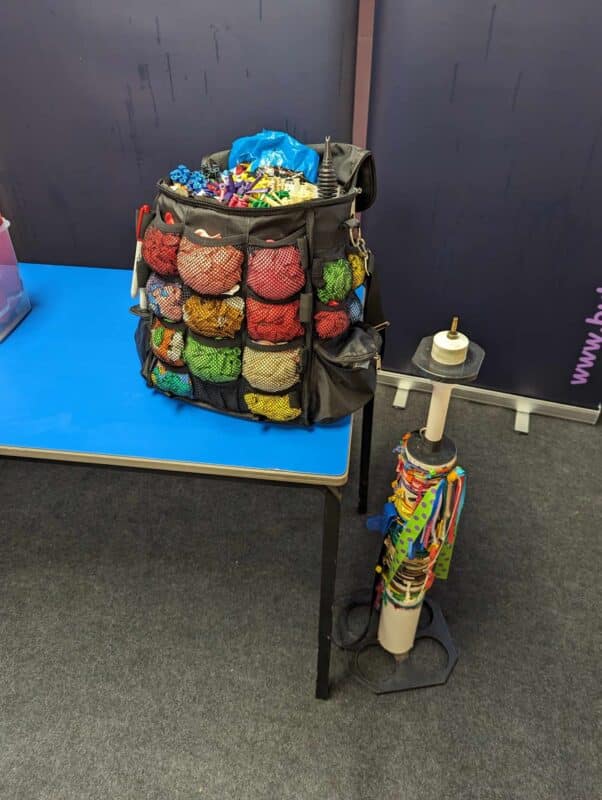
Our set ups vary depending on the type of job we are doing, its not something you need to worry about while you are learning however it is something you can consider so you are aware of your options for when you need a decent set up. For example when I did my first few balloon modelling jobs I used a basic box. Then when I started taking more jobs I upgraded to the Aloha bag which I still use today.
Cheaper options:
- Hand pump (We suggest the large Qualatex two-way green pump)
- Walkabout simple drawstring bag
- Basic box just to get your started (place upon a table)
Advanced (prices vary):
- Floor pump or battery powered pump
- Balloon apron
- Busking Bag
- Aloha bag (Great for when you have lots of different printed balloons).
Balloon Instructional Videos
Balloon Course - Intro to balloon menu

Introduction to the demonstration videos
In this course we will teach you 16 designs. The menu we will give you has 8 choices, so for each choice you will have 2 designs to choose depending on if you want to impress OR keep it simple when you have a big queue.
Doggy (1 balloon / SIMPLE)
Bubbly Heaven's Balloon Course: Easy Beginner Designs | Doggy Demo

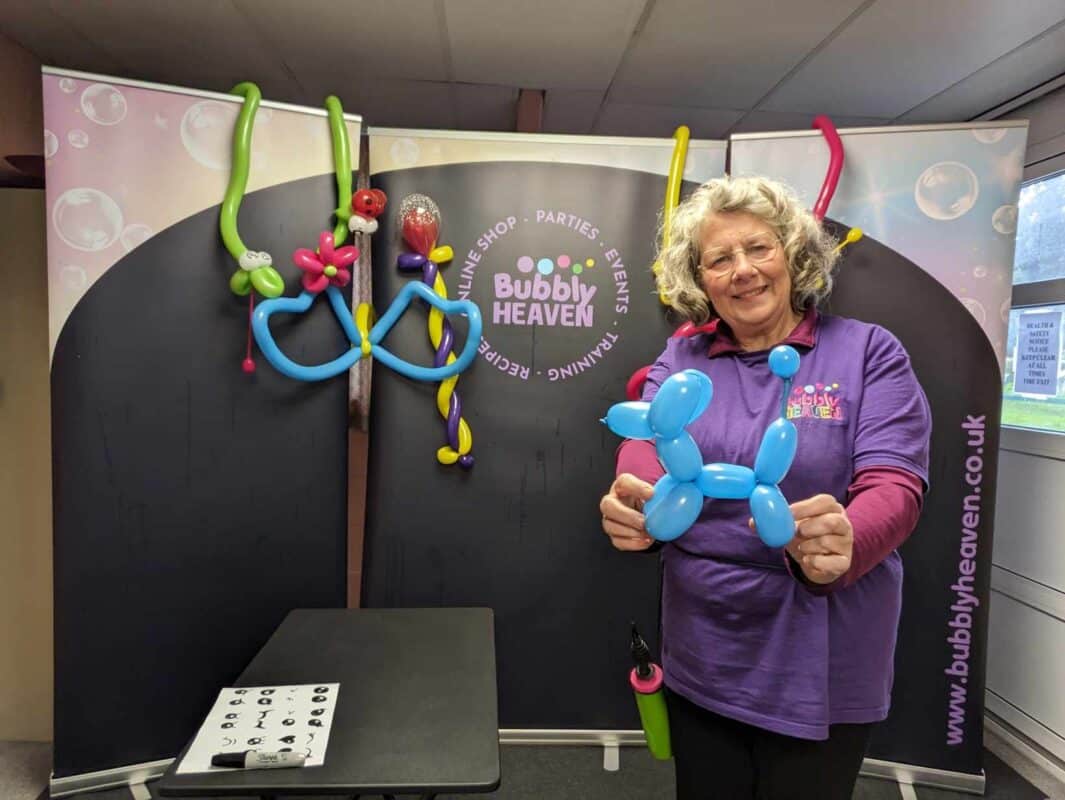
Doggy (1 balloon)
You will need:
- 1x 260
- sharpie
Inflate 260 with 3 pumps leaving an 8-finger nipple at the uninflated end (use the Qualatex green precision 2 directional pump)
Burp and tie the balloon.
Head – Make a 3-finger bubble, squeeze and twist, then hold between pinky and palm – remember to always twist in the same direction.
Ears – Make 2 more 3-finger bubbles. Twist them together. They are now held by pressure, you can release your hold. Lock the joint by rolling the head through the ears.
Neck – Make a 3-finger bubble, then hold between pinky and palm.
Forelegs – Make 2 more 3-finger bubbles. Twist them together. They are now held by pressure, you can release your hold. LOCK the joint by passing the end of the balloon through the middle of the forelegs. Pull it through by holding the uninflated section (the nipple) to prevent it from becoming inflated.
Body – Make a 3-finger bubble, then hold by holding between pinky and palm.
Back legs – Make 2 more 3-finger bubbles. Twist them together. They are now held by pressure, you can release your hold. LOCK the joint by passing the end of the balloon through the middle of the back legs as before.
Tail – Prepare to be amazing and impress others! Wrap dominant hand gently around the bubble at the base of the tail without squeezing or distorting the bubble. Use fingers in your non-dominant hand to surround the puffed section, without squeezing or distorting, leaving 1 finger of the nipple stickling out at the top. Sharply squeeze the bubble with your pinky and ring finger, so that some of the air is forced into the nipple sticking out at the top. It is essential to squeeze the inflated end of the tail so that the latex is distorted enough to keep its shape.
Draw artwork with Sharpie
Add Lead to Doggy (Now a flying doggy - 2 Balloon)
Balloon Course - Flying Doggy demo

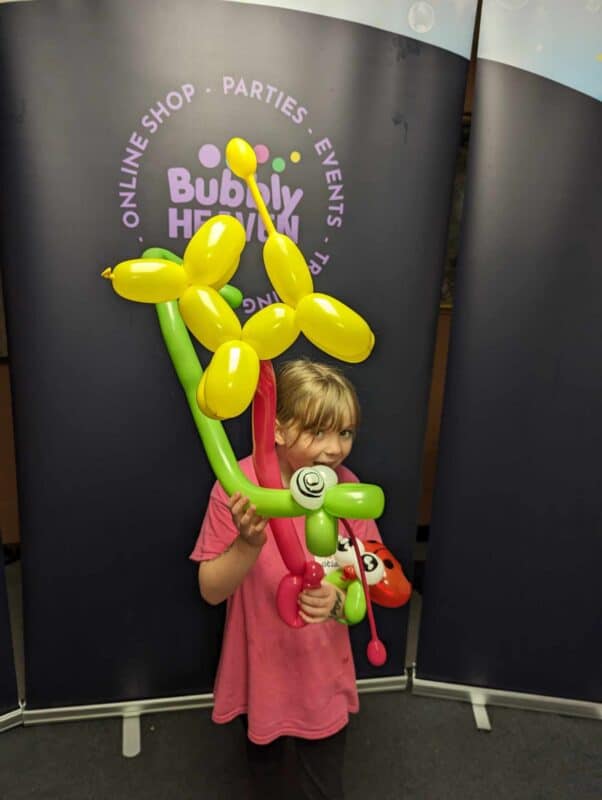
Flying Doggy (2 Balloon)
You will need: 1 x 260 to add to the one balloon doggie
Handle – Inflate 260 with 5 pumps and tie knot. Then squeeze to soften and elongate. At the knot end make a 2-finger pinch twist.
Then make a 4-finger loop (Squeeze and twist). Then lock the twist by passing the pinch twist (or the balloon end) through the loop.
Attach the handle to the dog – Squeeze the balloon to soften and elongate. Then secure the handle to the dog by taking the nipple and wrapping the nipple around the neck of the dog (at the joint above the dogs’ legs). Wrap it around 4 times and then feed through the dog’s legs then back to joint to lock. Pull tight and release nipple to hide it by embedding it into the joint.
Finish off by making a kink in the lead, do this by rocking the lead.
We call this a flying doggy as we do not want to encourage the child to put the balloon on the floor as it’s likely to pop, especially if outside on the grass (they are called blades of grass for a good reason!)
Googly Eyed Snake (2 Balloon/Simple))
Balloon Course - Snake demo

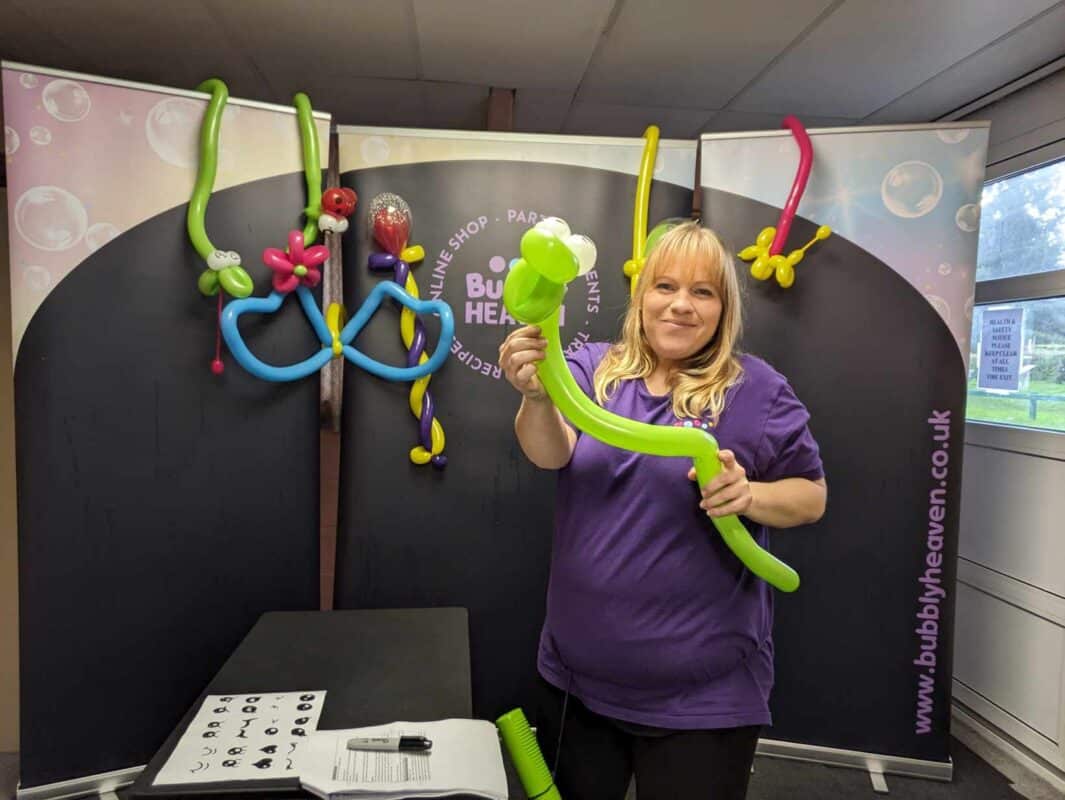
Googly Eyed Snake (2 Balloon)
You will need:
- 1 x 260
- 1 x 5’’ white round, black sharpie
Inflate the 260 with 7 pumps.
Mouth – Make a 4-finger loop. Twist 3 times. Pass knot through middle of the loop to lock, then hide the bead.
Secure loop between pinky & palm, then make a 2nd 4-finger loop. Twist 3 times.
Body – Squeeze and soften the remaining balloon length so no nipple remains.
Use your arm to curl the snake.
Hold the snake head under your arm – wrap the snake body tightly around your forearm. Lightly pluck along the curve to distort the balloon. You should now have a wiggly snake body.
Googly eyes
Inflate 5” white round with 1 pump, burp it enough to make it malleable, then tie.
Hold it halfway across, keeping the knot in the middle (under your thumb)
Squeeze & twist the eyes into 2 equal orbs. Twist twice.
Loop knot-end around the twist 3 times, still holding, as it isn’t secured.
Keep hold of one eye, take one loop of the snake head and twist them together and cross eyes over each other to lock. Now it’s locked. Hide the bead if it is still visible.
Adjust so that eyes are in the right place.
Add artwork to eye. I suggest swirly eyes hear.
Add Tounge To Snake (3 Balloon Snake)
Balloon Course - Snake tongue 1st

Snake tongue add on.
Balloon Course - Snake Tongue demo

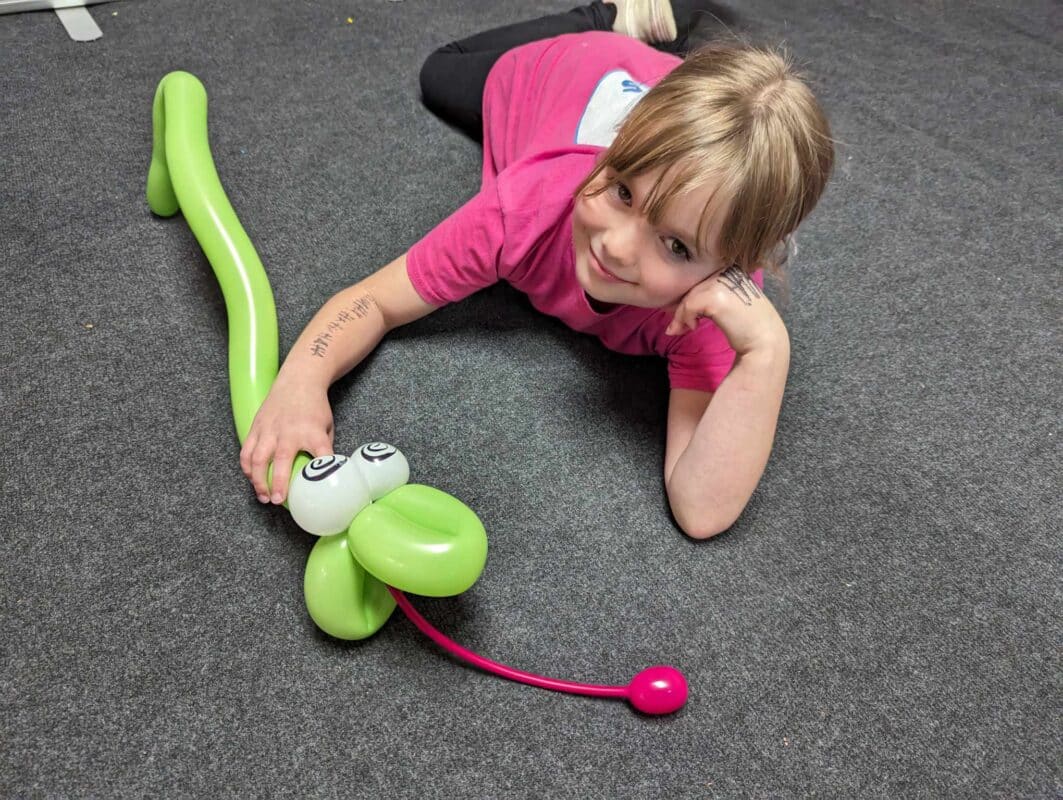
Googly Eyed Snake (3 Balloon)
You will need:
1 x 260 balloon
Tongue – Inflate the 260 very slightly to a round 2-finger ball.
Hold the tip of the ballon 2 fingers from the end. Stretch the tip of the balloon 3 times to weaken the wall of the tip. Hold the round ball inside the palm gently but firmly. Gently wrap the puffed balloon round the 3 fingers of the hand holding the ball. Use you other hand to make a shield around all but 1 finger at the tip of the balloon, preventing inflating anywhere except at the end. Sharply squeeze the bubble. When the end is a nice ball, pinch it and pump it out to distort the tip, so it maintains its shape. Wrap the knot around the snake’s neck in a figure 8, then hide the bead.
Sword (1 Balloon / Simple)
Balloon Course - Sword demo

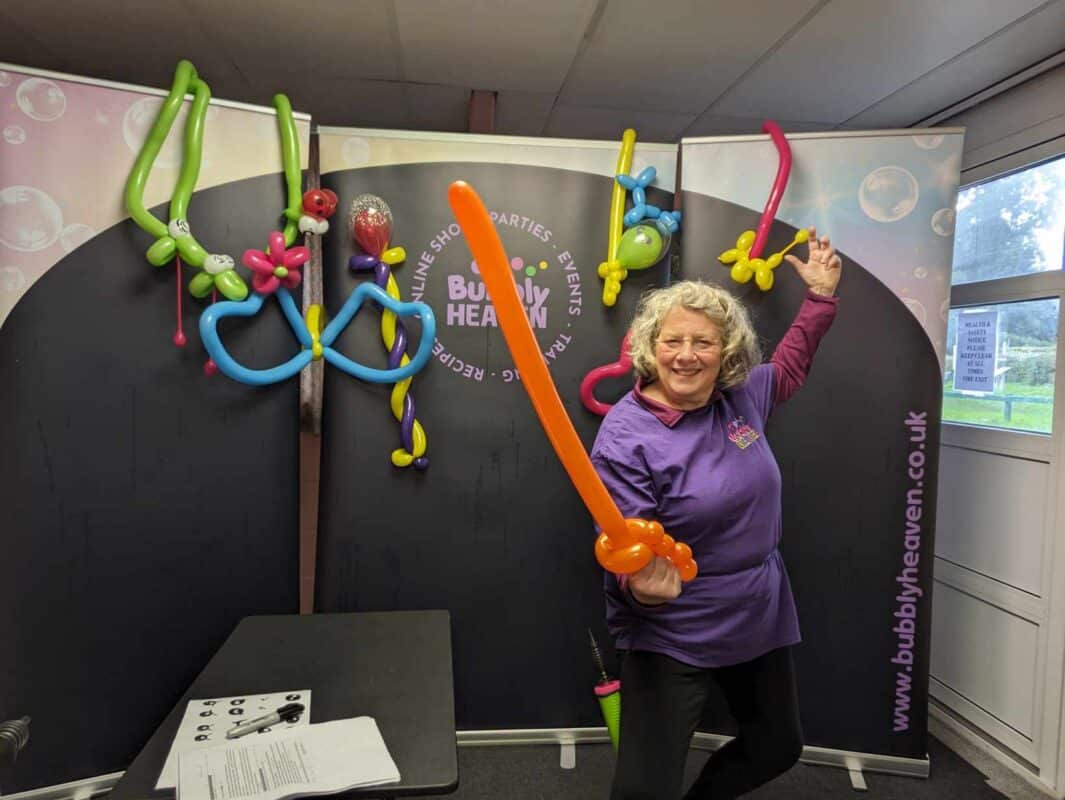
Sword (1 Balloon)
You will need:
1 x 260
Inflate the 260 with 8 pumps.
Hilt – Make a 2-finger pinch twist, then hold between pinky and palm.
Make a 4-finger loop, twist it 2 times, then push the pinch twist through the loop to lock it. Hold between pinky and palm, then make 3 precision bubbles…… DO NOT LET GO! Make the precision bubbles by making 3 consecutive 2 finger bubbles, twisting each bubble 2 times. Make them as spherical as you can.
Blade – Now hold the end of the balloon, then release the hold with your pinky and palm – DO NOT LET GO! Push the end of the balloon through the loop. Once it is held by the pressure of the loop, you can let go. PHEW! Now pull it through, stopping when you still have a hand’s length for the hilt. You can get a child to do this part.
Add Alien Head (3 Balloon Sword)
Balloon Course - Alien Sword demo

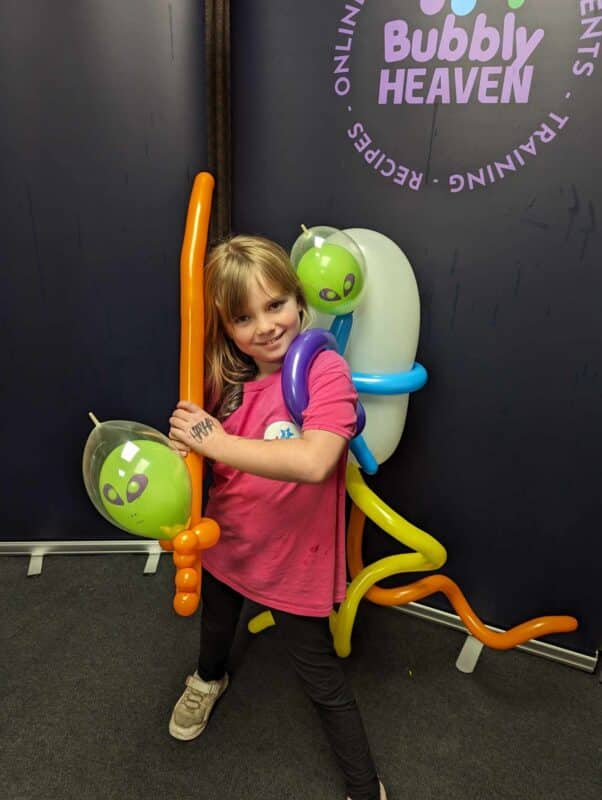
Alien Sword (3 Balloon)
You will need:
- 1 alien printed 5’’ round
- 1 clear 5 or 6’’ round.
Alien head – You are going to double stuff the alien head inside the clear balloon.
Double stuff 2 round balloons.
Fold the uninflated alien head in half and then again in half, hold this fold together. Feed the rolled-up alien head into the clear balloon until both beads are at the same height.
Holding onto both beads, carefully feed the balloon pump between the clear & alien beads. Keep holding both beads and partially inflate the clear balloon with 3 pumps.
Remove the pump, making sure that both beads are sealed. Now insert the pump into the alien head. Pump until inflated (5 pumps) – DO NOT OVER-INFLATE.
Tie both balloons at the same time. It’s a bit stiff.
Attach – Wrap the double bead twice around the pinch twist on the sword and then through the loop and hide the bead.
Wearable Ladybird (3 Balloon / Simple)
Balloon Course - Lady Bird demo

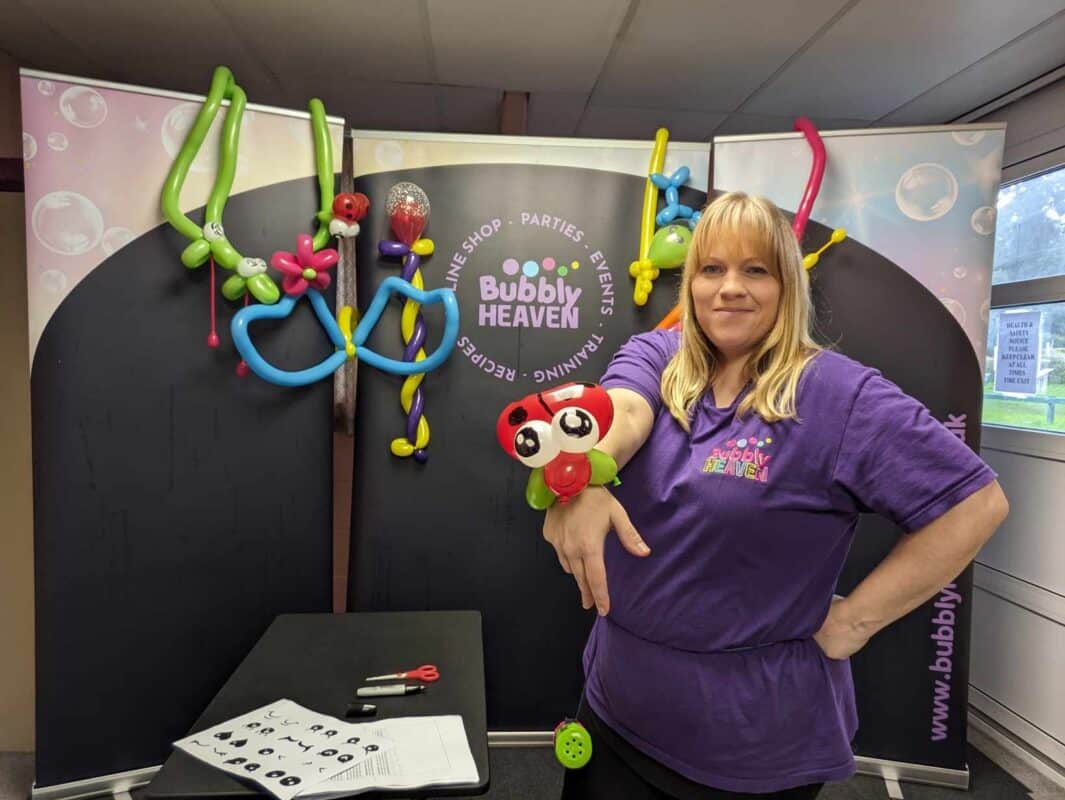
Lady Bird (3 Balloon)
You will need:
- Scissors or balloon cutter
- Sharpie
- 1 x Green 260
- 1 x White 5” round
- 1 x Red 6” heart
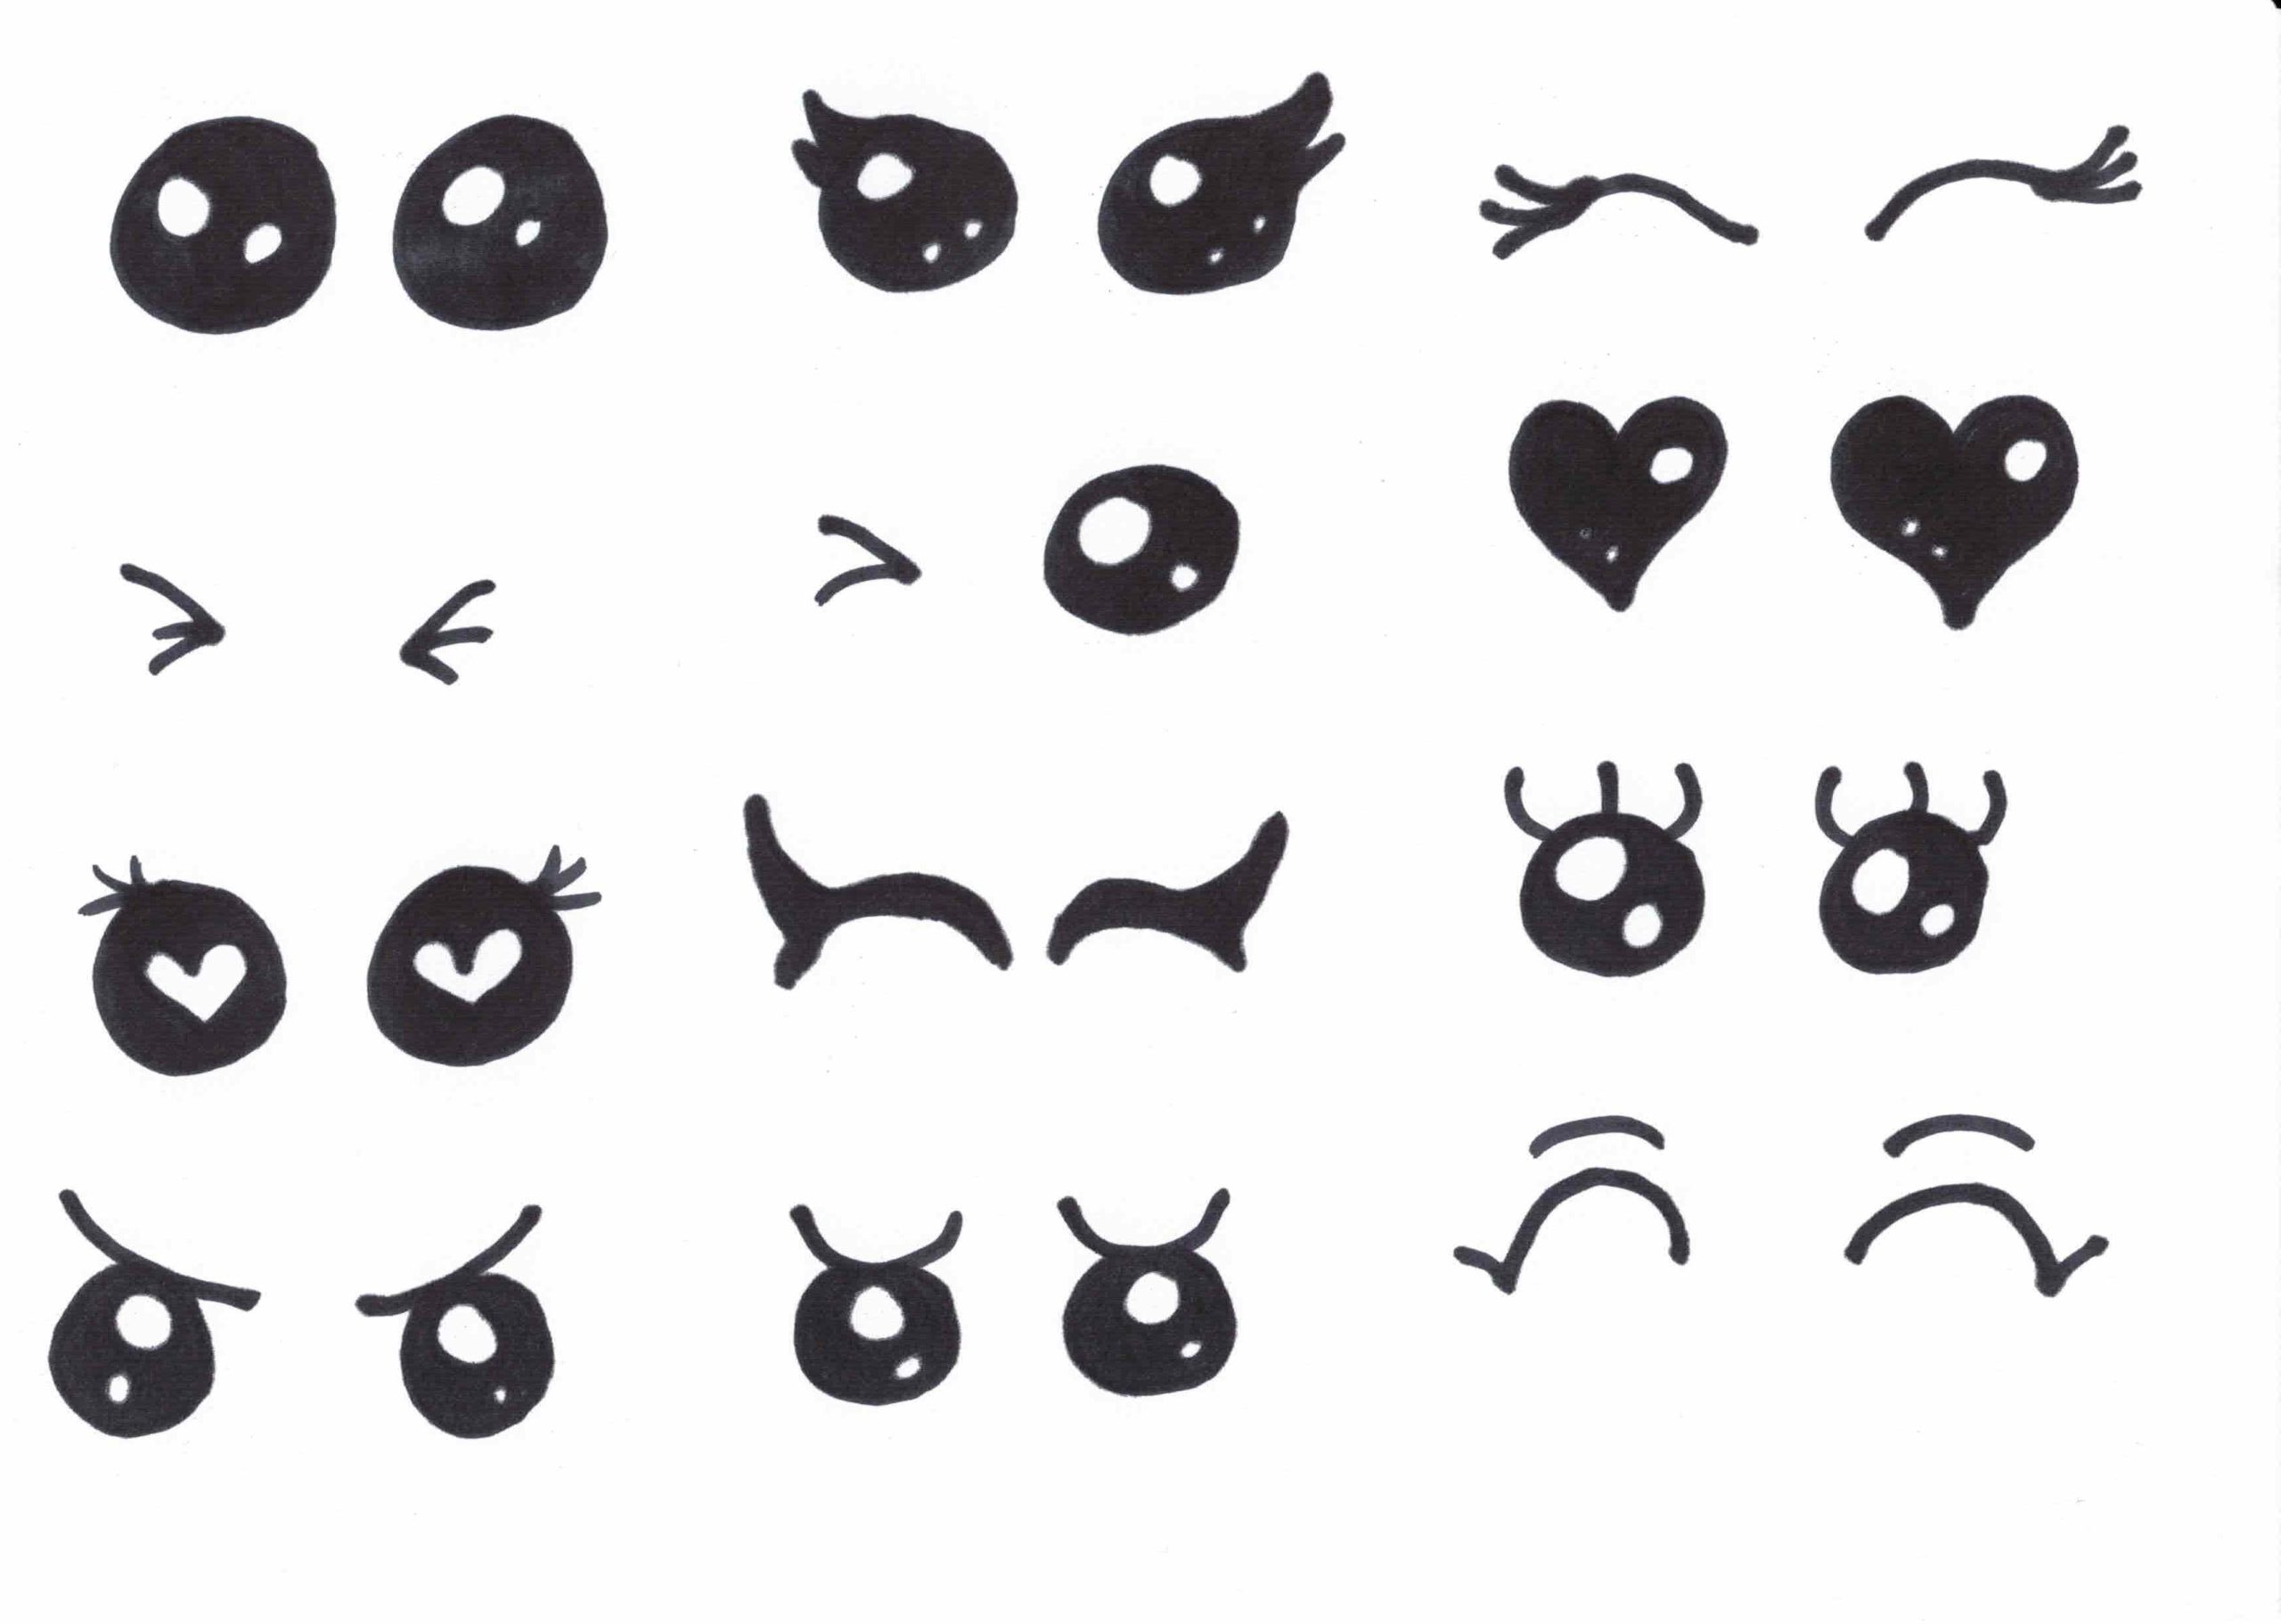
- Cute eye sheet for reference
Ladybird body – Inflate the heart balloon with 3 pumps. The heart should still be malleable. Tie the heart balloon. Squeeze and twist the knot end into a 2 or 3-finger bubble (twisting 3 times) to make the head. Now hold this in place by placing the balloon under your armpit (So that your hands are free to make the eyes).
Eyes – Inflate the 5” round with 1 pump, then burp slightly so that is malleable. (This may take some practice at first). Hold the balloon halfway (placing the knot in the centre) then twist at the centre so that you have 2 even bubbles. (If your bubbles are not even you can untwist slightly and re-distribute the air). Once the bubbles are even, twist 3 times and wrap the bead around the twist 3 times. These are not secured yet so keep hold of both eyes in one hand.
Attaching eyes to body – With the other hand pick up the body (whilst still holding the body’s twist to stop it unravelling). Place the eyes on the neck of the ladybird and twist one eye around the neck.
Legs & Bracelet – Inflate 1 pump into the green 260 then burp so that the balloon bubble is 8-fingers long and soft. Twist the bubble in half, now wrap this twist around the ladybird’s neck 2 times to secure. You have now created the legs.
Bring the puffed end to meet the knot, creating a triangle shape. Tie where the puffed end meets the knot. Cut the excess off. Draw spots and cute eye artwork (Refer to printed sheet).
Baby Bug (1 Balloon attractive to teens/adults)
Balloon Course - Baby Bug demo

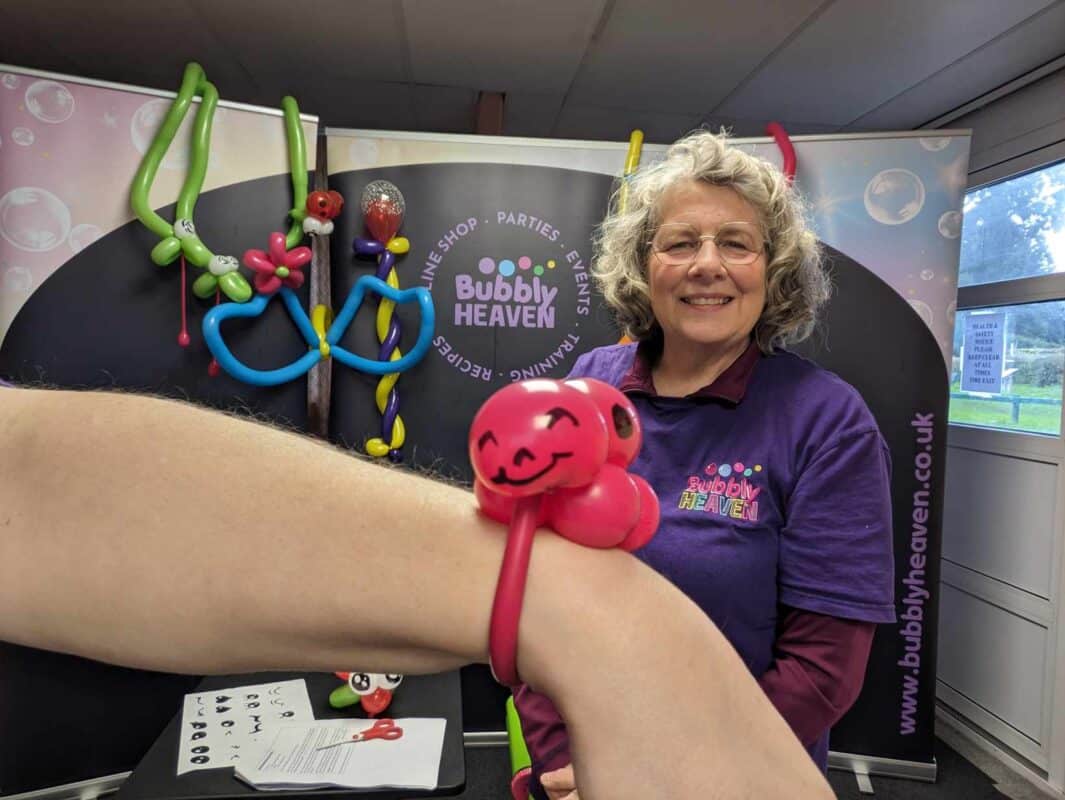
Baby Bug (1 Balloon)
You will need:
- 1 x 260, Scissors or balloon cutter
- Sharpie
- Scissors or cutter
- Cute eye sheet for reference
Inflate the 260 balloon to make a 4-finger bubble and tie knot.
Head – Make a 2-finger pinch twist at the knot end by making a soft 2 finger bubble then pulling the knot into the joint and twisting the bubble. Wrap the knot around the twist and tie it to itself hold between the pinky and palm.
2 times and hold the head between pinky and palm.
Legs – Create 4 small precision bubbles (less than 1-finger each) by squeezing and twisting 4 times with 1 full twist in between each bubble. These we will call bubble 2, bubble 3, bubble 4 & bubble 5. Twist the end of bubble 5 to the neck, so you have a head, 4 legs and a body with a “tail” sticking out.
Body – Take the tail and feed it through the hole in the middle of the 4 small bubbles. You must hold the small bubbles so they don’t untwist. When you’re nearly there, hold the body of the baby bug and pull the tail all the way through, so the body sits snugly over the 4 legs.
Wearable – Using the tail, make a loop big enough to go around the recipient’s wrist and wrap it round the neck twice. Tie it to the neck with a double knot. Snip off the excess tail.
Then use the sharpie to create face and spots artwork.
Carolines Heart wand (2 Balloon / Simple)
Balloon Course - Carolines heart wand demo

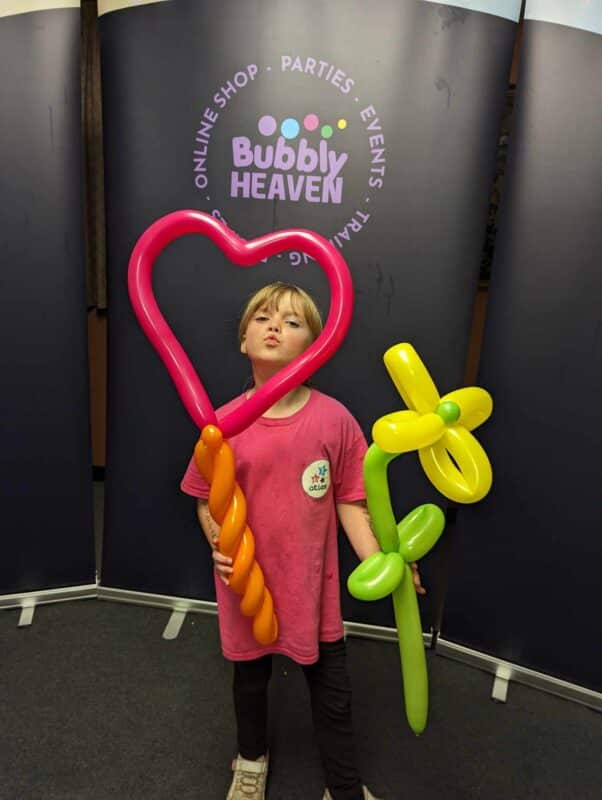
Heart Wand (2 Balloon)
You will need: 2 x 260
Handle – Inflate one 260 fully with 8 pumps and give it a big burp to soften, leaving a small nipple at the end.
Fold the balloon in half. Hold the fold in both hands, with the ends sticking up in the air. Place the heels of your hands on either side of the fold and apply light pressure on the balloon. Using your fingers, curl the balloons tightly around each other, to create a twirl, sliding your hands up the balloon as you progress, maintaining the pressure with the heels of your hands.
Stop when you have enough balloon left to make two 2-finger bubbles left. Squeeze and twist, making two bubbles. Pass one bubble through the twist to lock the joint. Create a pinch twist on the bubble with the knot on the end by pulling the knot into the joint and twisting the bubble. Wrap the knot in a figure 8 and then hide the knot.
Heart – Inflate one 260 fully with 8 pumps, burp slightly to keep the balloon firmly inflated and leave a small nipple at the end.
Tie both ends of the balloon together tightly using a double knot. Fold the balloon in half, pulling it apart with your thumbs (one thumb on the knot, the other at the half-way point). Push the half-way point to the knot and hold it there with one hand. The balloon will look like two leaves at this point.
Dimple – Hold the folded, half-way point in one hand so that a 3-finger loop is sticking out. DO NOT TWIST. Hold the balloon against your chest to keep it flat and create a dimple by distorting the balloon: Grab the 3-finger loop with the whole of the other hand, squeeze, pinch and release 4 times (it will make a popping sound). Your heart is nearly formed. The heart might not lay flat, this will be fixed during the next step if it happens. Distort each lobe by holding just above the dimple with one hand and half-way down the lobe with the other and rock the top of the lobe. This will make a nice curve as well as flattening the heart. Do this on both lobes. Repeat the rocking process until the heart lays flat and looks good.
Place the heart’s knot in between the two bubbles at the top of the wand. Wrap the knot around the two bubbles in a figure 8, then hide the bead. Adjust the bubbles so that the heart sits upright on the wand.
Cheryls heart wand - (3/4 Balloon)
Balloon Course - Cheryl's heart wand demo

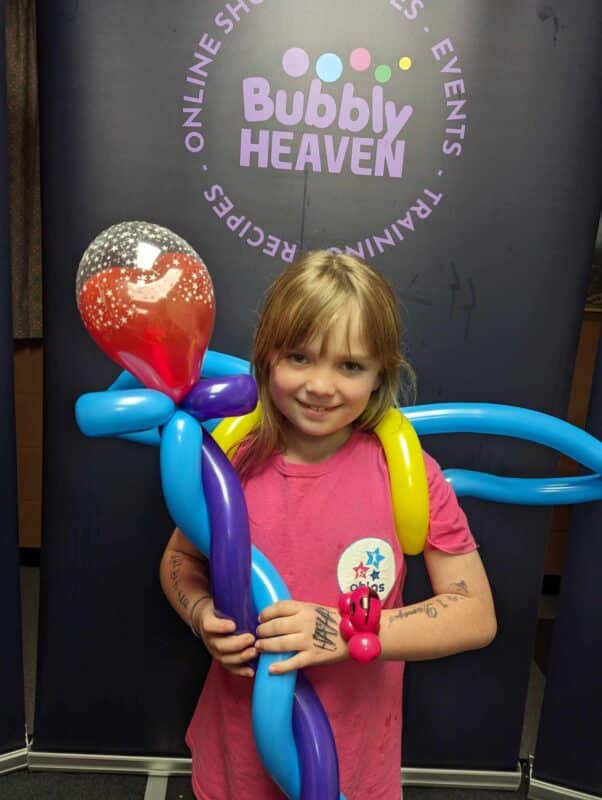
Heart Wand (3/4 Balloon)
You will need:
- 2 x 260 (I ask the kids what is their favourite colours)
- 1 x 6” heart
- (Optional) 1x 5’’Stars-A-Round printed balloon
Handle – Inflate both 260s with 6 pumps. Leaving a 3-finger nipple. Tie the balloons. Then tie the balloons knot ends together. Make a 3-finger loop in 1 balloon and twist 3 times. Then make a 3-finger loop in 2nd balloon and twist together 3 times. This is the top end of the wand.
Gently squeeze the top of both balloons before twisting them together. (I am doing this to push the air down through the balloon making it a little softer).
Creating the twirl – Hold the loops with your thighs while you curl the balloons around each other to create a twirl until you are left with a 5-finger bubble on each side. Now squeeze and twist the two the end together leaving a 5-finger bubble, twist 3 times.
Use the uninflated ends (nipples) to pull both bubbles into a loop and twist the loops together
Twist the loops 3 times whilst holding the nipples and then wrap one nipple around the loops in a figure 8 to lock. This is the bottom of your wand.
Plain Heart topper – Turn the wand over and tuck it under your arm, then pump up a heart fully and tie.
Attach: Pull the bead into the top of the wand, wrap it round the loops in a figure of 8 and hide the bead.
Double Stuffed heart topper – Using the heart and printed star clear balloon.
Roll up the uninflated heart balloon, holding the fold together. Feed the rolled-up heart balloon into the clear star balloon until both beads are at the same height.
Holding onto both beads, carefully feed the balloon pump between the clear star & heart beads. Keep holding both beads and partially inflate the clear balloon with pumps.
Remove the pump, making sure that both beads are sealed. Now insert the pump into the heart balloon. Inflated with 5 pumps – DO NOT OVER-INFLATE.
Tie both balloons at the same time. It’s a bit stiff.
Attach: Pull the beads into the top of the wand, wrap it round the loops in a figure of 8 and feed it through the loop to secure it.
Adjust so it’s nice and neat
Ta daaaa!
Wearable Fairy wings (3 Balloon – Simple)
Balloon Course - fairy wings demo

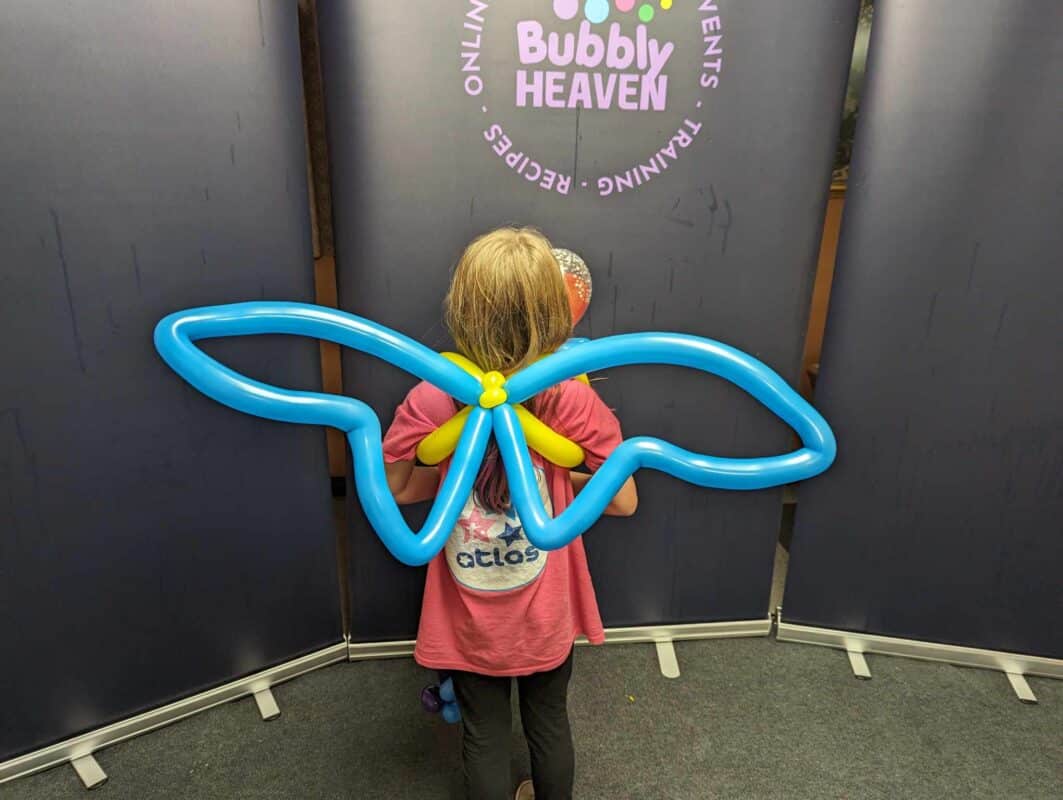
Fairy Wings (3 Balloon / Wearable)
You will need:
3 x 260 (1 colour for the halter and 2 of another colour for the wings).
Shoulder Straps – Inflate the balloon with 8 pumps and do a big burp to leave a 2-finger nipple. Create two 2-finger pinch twists at the knot end, then make a big loop by wrapping the nipple into the two pinch twists in a figure 8. Fold in half by placing your thumbs at opposite ends of the balloon, one thumb at the pinch twists, squeeze them together and twist into 2 smaller loops. Shape into a v shape. (If you have a larger person you can use 2 balloons to create this).
Fairy wings – Inflate both balloons with 8 pumps, then burp slightly. Tie the first balloon into a loop. Tie tightly and double knot. Feed the second balloon through the first loop, then tie it into a loop. Tie tightly with a double knot. You now have 2 big loops that are interlocked. Twist one of them round 3 times to firm up the joint.
Shape the wings – Holding one wing at a time: Distort the balloon by holding it about ¼ of the way along the loop. Create a curve by rocking the balloon, then stretch and release the curve to distort and form a dimple. Move your hand past the first dimple and distort the balloon to form a second dimple, this time facing inwards. Ten fingers further down, distort the balloon outwards again to create the third dimple. Repeat on the other wing.
Put it all together: Wrap the joint of the wings around the two pinch twists in the shoulder strap. Wrap the bead in a figure 8 and hide all beads. Adjust the wings so that they are nicely aligned, put them on and take flight.
Wearable Jet pack (7 Balloon)
Balloon Course - Jet pack demo

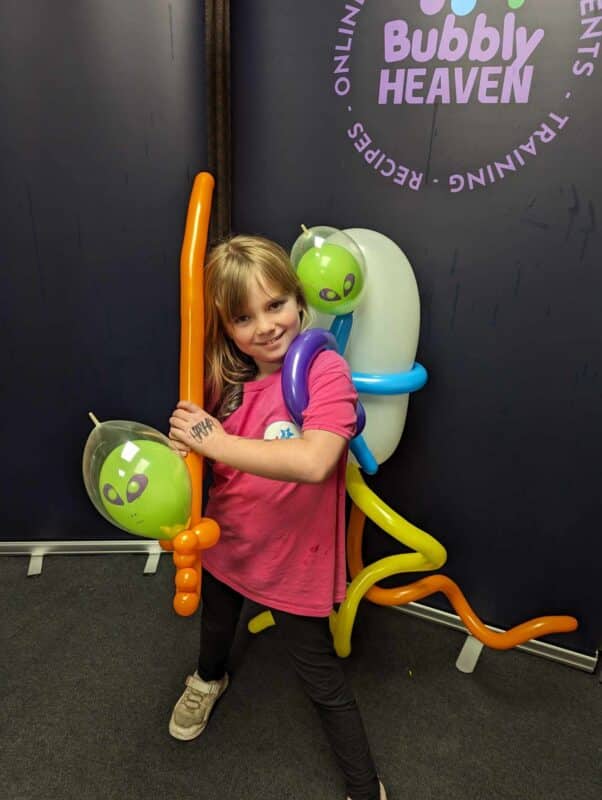
Jet Pack (7 Balloon / Wearable)
You will need:
- 1 x 646
- 4 x 260
- 1x alien head
- 1x clear 5’’ or 6’’ clear quick link
Cylinder – Inflate 646 fully. Burp to soften and leave a 3-finger nipple
Fold balloon in half and tie together. (The knot end is the bottom of the tank)
Tank Attachment – Inflate 260 with 7 pumps and squeeze and elongate.
Wrap the 260 around the 646. Squeeze and twist so that the 260 is now wrapped around the tank, leaving two bubbles (balloon ends) sticking out. (We will attach the halter to these).
Shoulder Straps – Inflate another 260 with 7 pumps, tie to make a big loop then, hold the knot end and the opposite end pushing and twisting the two sides together to make a figure of 8. This now your shoulder straps.
Squeeze and twist 3 times and attach the shoulder straps into the two bubbles on the jet pack attachment by twisting the attachments bubbles around twist in the shoulder straps. Use one of the attachment bubbles to wrap around the shoulder straps in a figure of 8 to lock.
Adjust the balloons so that the shoulder straps bead is pointing upwards and round end is pointing downwards. And adjust the halter.
Flames – Using a yellow and orange (or whatever coloured flames you desire).
Fully inflate both and burp to leave a little nipple.
Curl both balloons on your arm: Place knot end under arm, wrap the balloon all the way round your arm till the end reaches your hand. hold end firmly in hand, lightly pinch and pluck along the curve to distort the balloon.
Do the same for the other balloon.
Tie the orange and yellow balloons beads together. Then tie the knot to the bottom of the tank. (bottom of the tanks loose nipples).
Add alien encounter –
You will need: 1 alien printed 5’’ round, 1 clear 5 or 6’’ round.
Alien head – You are going to double stuff the alien head inside the clear balloon.
Double stuff 2 round balloons.
Roll up the uninflated alien head, holding the fold together. Feed the rolled-up alien head into the clear balloon until both beads are at the same height.
Holding onto both beads, carefully feed the balloon pump between the clear & alien beads. Keep holding both beads and partially inflate the clear balloon with 4 pumps.
Remove the pump, making sure that both beads are sealed. Now insert the pump into the alien head. Pump until inflated (5 or 6 pumps)– DO NOT OVER-INFLATE.
Tie both balloons at the same time. It’s a bit stiff.
Attach – Tie the double bead to the bead end of the tank attachment.
The child can wear the jet pack like a ruck sack (back pack) by putting their arms through the shoulder straps.
Baby Octopus (2 Balloon – Simple)
Balloon Course - Baby Octopus demo

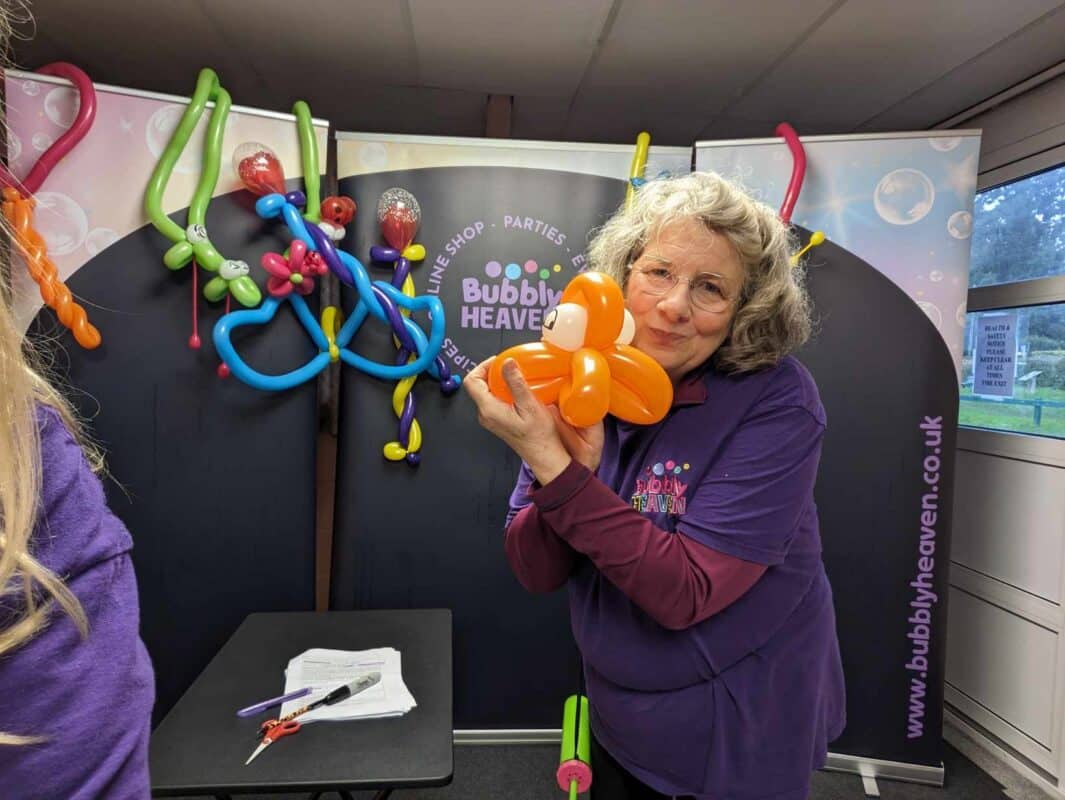
Baby Octopus (2 Balloon)
You will need:
- 5” white round for eyes
- 1 x 260 balloons for body
- Sharpie
Inflate 260 with 6 pumps, burp to leave a 5-finger nipple.
Make a 3-finger loop. Wrap the bead around the twist, then pass it through the loop.
Googly eyes – Inflate the 5” round with 1 pump, then burp slightly so that is malleable. (This may take some practice at first). Hold the balloon halfway (placing the knot in the centre) then twist at the centre so that you have 2 even bubbles. (If your bubbles are not even you can untwist slightly and re-distribute the air). Once the bubbles are even, twist 3 times and wrap the bead around the twist 3 times. These are not secured yet so keep hold of both eyes in one hand.
Push one eye firmly through the 3-finger loop. Use the other hand to open up the loop to persuade the eye bubble through.
Squeeze the next section of balloon with both hands so it softens and extends the balloon. Grab the end nipple, tie it round the two eyes in the figure of 8.
Fold the big loop in half to make 2 loops, twist at the centre. Do the same again on the 2 smaller loops so you now have 4 loops.
Adjust the legs and add artwork to the eyes.
Big Octopus (7 Balloon)
Balloon Course - Big Octopus demo

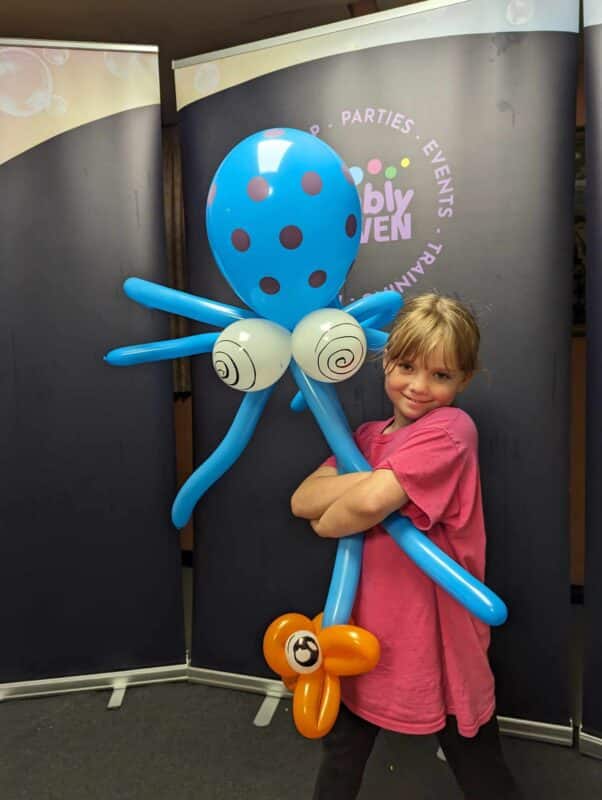
Big Octopus (7 Balloon)
You will need:
- 11” printed round, or plain 12” round
- 4 x 260s
- 2 x 5” white round
Start by inflating all your balloons – I usually ask the kids in line to help hold the balloons once I have pumped and tied.
Inflate 11” round fully – tie it off.
Inflate the x4 260s fully
Inflate 5” rounds fully and tie them together into a duplet.
Legs – Gather all x4 260s so they are in a bundle and in line with each other.
Find the halfway point and squeeze them together with 2 hands and twist them together (3x) so you have a bundle on 8 legs.
Whilst still holding the bundle, take the knot/bead of the 11” round and attach it to the bundles twist using a figure of 8 around any of the 260 balloons, It is now locked.
Manipulate each leg to shape them by grabbing each one, bending in half and rock to bend each leg. You can curl each leg if you have time.
Eyes – The 2 white 5” rounds will become your 2 eyes. Tie both the eyes together. Now you are going to attach your eyes, do this by pushing the knots of the eyes towards the base of the 11” round. Wrap the eyes around the base of the 11” round. Then wrap both eyes around each other a full turn, Then take one eye and wrap the whole balloon in a figure of 8 motion around any 260, to lock.
Add artwork to both eyes. A quick hypno eyes is good here or if you have more time you can do some big cute eyes.
VIKING HAT (bull/longhorn) - (2 Balloon - Simple)
Balloon Course - Viking hat demo

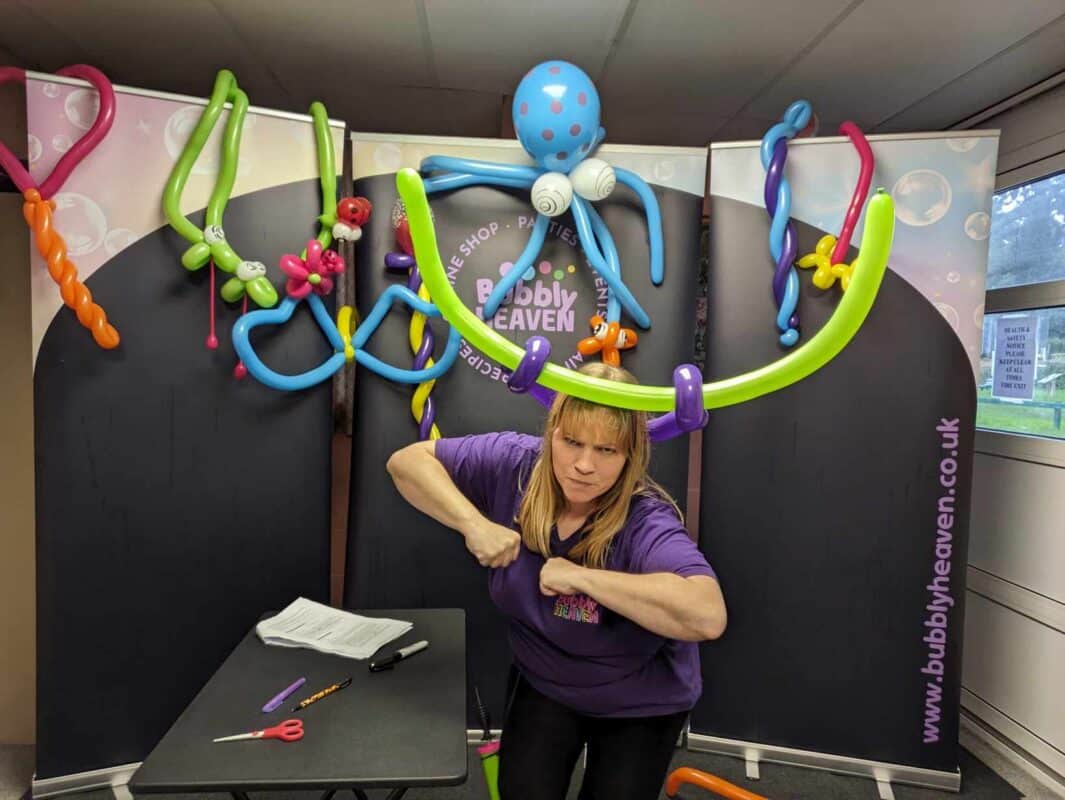
Viking Hat (2 Balloon)
You will need:
- 2 x 260
This will fit any size head.
Head band – Inflate one 260 with 6 pumps, leaving a 4-finger nipple. Squeeze knot end to soften. Make a 2-finger pinch twist. Then a 4 or 5-finger loop. Push the pinch twist through the loop to lock. Squeeze and push the air through the whole balloon. At the end of the now soft and fully balloon, make a 2-finger bubble, then a 4 or 5-finger loop, twisting 3 times to secure, then push the bubble through the loop to lock.
Horns – Inflate the other 260 balloon with 7 pumps and tie a knot. Squeeze the balloon to soften and elongate. Feed the fully inflated balloon through the 2 loops of the head band. Adjust the position of the “horns” so that the hat fits the head and both horns are the same length. Grab the horn and rock along them to shape as desired.
Turn the viking Hat into a flower hat
5 Petal Flower
Balloon Course - Flower hat

4 Petal Flower
How to make a balloon flower EASY BEGINNER "Bubbly Heaven's Balloon Modelling Course" - 4 petals

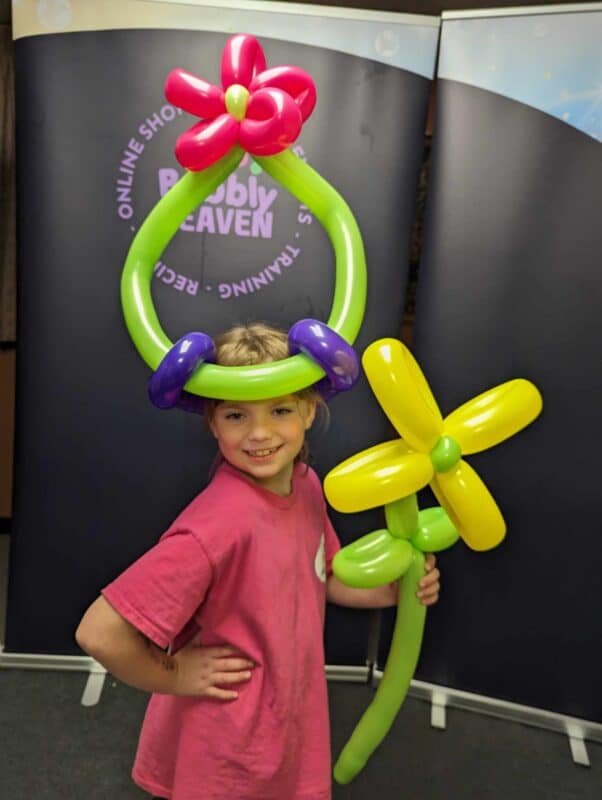
Flower Hat & Flower To Hold (5 Balloon)
You will need:
- 3 x260s
Continuing from the Viking hat.
Turn horns into a loop – Make two 2-finger pinch twists at the knot end of the horns. Take the nipple at the other end and wrap it around the two pinch twists in a figure 8 so you have a big loop. Push the loop through the head band until the two pinch twists are at the highest point and the hat is symmetrical.
Flower head – Inflate a 260 balloon with 6 pumps leaving a 5-finger nipple. Start at knot end and make a 3-finger loop, take the knot and pass it through the loop to secure. Make 4 more 3-finger loops creating 5 flower petals. Hold firmly onto the nipple after the last loop and wrap it around two loops at the front in a figure of 8 then pull it tightly between the pinch twist on the top of the hat and wrap it around in a figure of 8 to lock. Now manipulate and organise your petals.
Add flower to hat – Pull one pinch twist through to the front of the petals and push one behind. The flower will be pointing up so grab the big loop with both hands and bend and rock so that the flower bends forward.
Four petal flower – If you are struggling with a 5 petal flower at the beginning you can created a 4 petal more easily. Inflate 260 balloon 8 pumps leaving a very small nipple. Burp to soften so you now have a 1 finger nipple, then tie both ends together to create a big loop. Find the hal- way point by stretching and squeeze half-way point to knot end and twist one loop twice (creating two loops). Then put the two loops together and find the half-way point again and squeeze tightly together the half-way point and knot side so you know have 4 loops. These will be your 4 petals.
Flower stem: You can make an additional flower head and add it to a stem for a lovely extra. Inflate a 260 balloon with 8 pumps and soften with a long burp. Make a figure S in the centre of the balloon, with each leg of the s being 10 fingers long. Squeeze the centre of the figure S and twist so that you are creating two leaves. Lock by passing one end of the balloon through the centre both leaves. Take the nipple end of the balloon, squeeze the nipple out, make a 1 finger twist and pass that through the centre of the flower. Fold the stem behind the flower and rock to create a bend, then fold the leaf shapes upwards and squeeze to create a curve. Adjust the flower.
Now you have a flower to hold.
Join our Facebook Group
We welcome you to join our Newbie Balloon Modeller Facebook Group.
Print out the menu & cute eye sheet
MENU
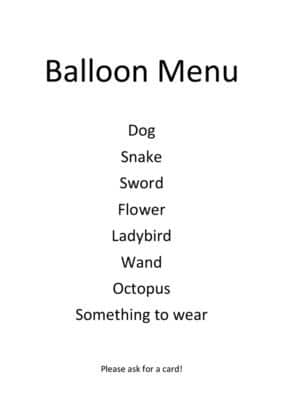
We have created this simple balloon menu to get you started as a newbie balloon modeller. We have kept the description simple so that you can improvise which version you make (simple or added extras). For example if you are at a party and you have more time per child you can make the versions with added extras. However if you are at a very busy event and you have a big queue you can make the simple versions.
CUTE EYE SHEET
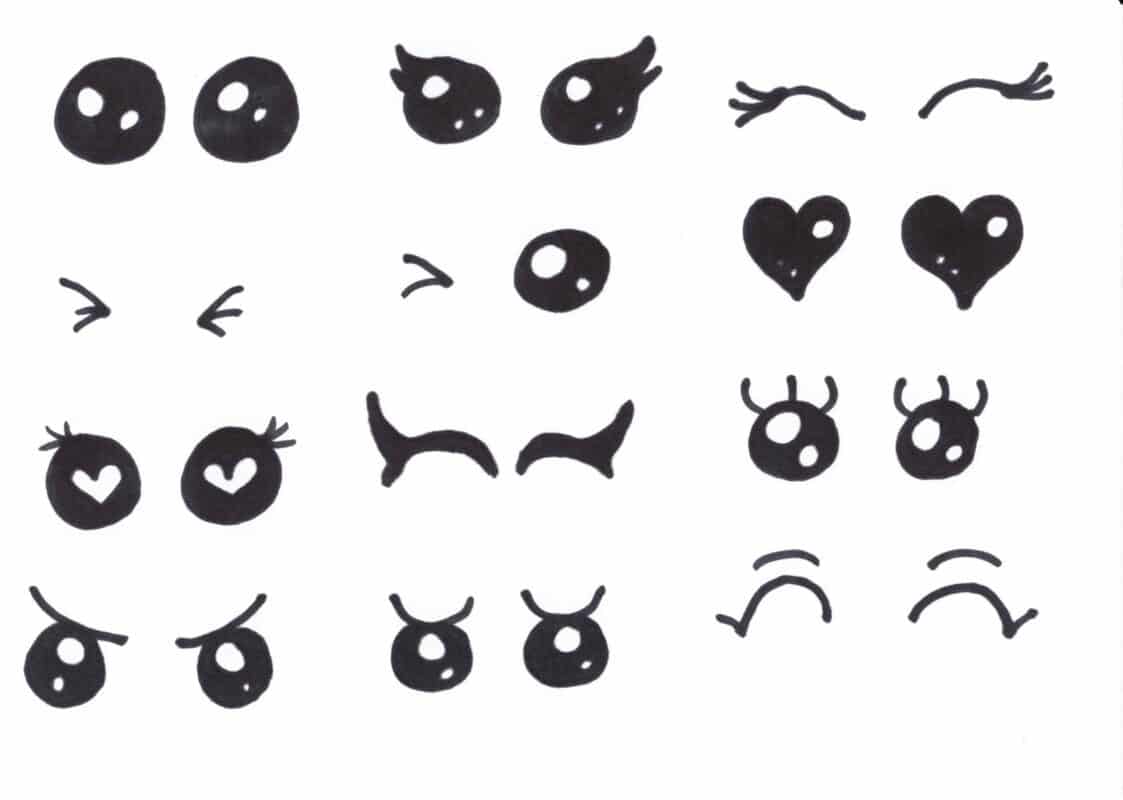
Its helpful to have a printed out sheet of cute eyes to copy when you are first learning.
With thanks to
We would like to acknowledge a few people who we have learn’t from over the years.
This list will also give you some names to research.
- Twistina (Christine Belcher)
- Graham Lee (Care & Share Days)
- Holly the Twister Sister (Youtube Channel)
- Marvin Hardy (Books)
- Dave Crofts (Instagram david_balloons)
Want to learn more with us?
Get 30% Off Today

(4)
Original price was: £9.99.£7.00Current price is: £7.00.
Frequently asked questions
Q) Do I have to get Qualatex balloons?
A) We recommend Qualatex as we know you will get good results with them. Other balloons behave differently. Cheaper balloons may pop quicker and will also be different sizes and our instructions are for Qualatex. Qualatex are industry standard. Once you are experienced you may find other brands suitable like Sempertex etc however as a beginner we suggest going with Qualatex brand.
If you have any questions please email cheryl@bubblyheaven.co.uk